Capped pipes in the floor may indicate future bathroom plumbing, but they do not establish that a bathroom can be connected as planned. The pipe purposes, concealed routes, condition and relationship to the finished layout need confirmation. Start with photographs and records, then ask a plumber what must be identified or tested before existing work can be reused.
What should you look for without opening anything?
Document visible capped pipes, covered floor openings, accessible vertical piping, cleanouts and any basin or pump equipment. Take a wide room photograph before close-ups so the location of each feature remains clear. Record nearby walls and planned fixture positions, but leave unknown pipe functions labeled “unknown.”
Do not remove caps, open a sealed basin or introduce water to see where it goes. A useful pre-visit survey is observational. It does not need to become a plumbing test, and a photo cannot show everything below the slab.
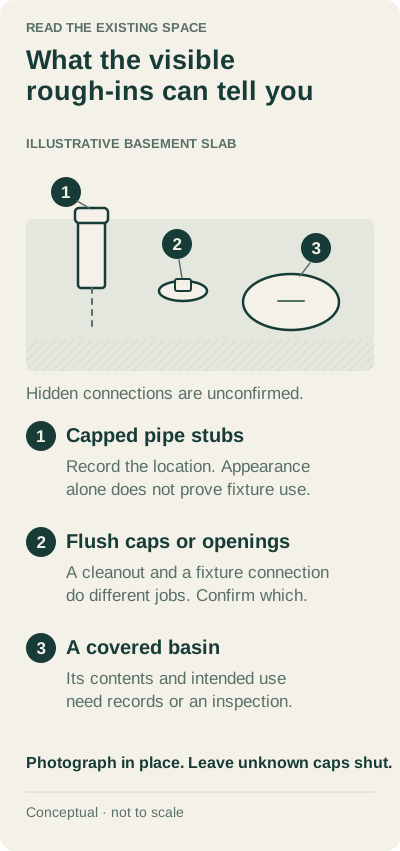
What could the visible components mean?
| Observation | Possible relevance | What it does not confirm |
|---|---|---|
| Capped pipe rising from the floor | A planned fixture connection or other plumbing provision | Fixture type, route, condition or approval |
| Accessible capped fitting on piping | A cleanout or another service point | Permission to use it as a new fixture drain |
| Pipe continuing upward | Part of a drainage or vent arrangement | Whether it can serve your proposed fixture |
| Covered basin with piping or wiring | A pumping system | Whether it handles groundwater, sewage or the new load |
| Earlier rough-in drawing | The intended configuration | Whether later changes occurred or the current work matches it |
These are possible interpretations, not diagnoses. The drainage comparison explains why a groundwater sump and a bathroom sewage system need different treatment. Manufacturer instructions also distinguish equipment families; Liberty’s Pro380 product information identifies a sewage system, not a universal use for any basement basin.
Does existing rough-in plumbing fit the bathroom you want?
Compare the proposed fixture positions with the finished walls, not just the unfinished foundation or exposed studs. Wall buildup, a shower base, a different vanity and the final floor surface can change how a previously intended layout works. Ask the plumber to review the actual fixture specifications before work is fixed in place.
Adding a shower to a toilet-and-sink layout is a change in scope. Moving a toilet is also different from simply setting a fixture on an existing connection. Record what you want to keep, move or add, then ask which existing work remains usable. Our drain relocation service guide separates those tasks from finish plumbing.
What records are worth finding?
Look for the original basement plan, plumbing permit, inspection approvals, builder handover documents and construction photographs. A dated photograph showing piping before concealment can help the plumber ask better questions, especially when a drawing is incomplete. Keep the original file if available rather than relying only on a small screenshot.
An approval record establishes what the authority recorded at that point in time. It is not a warranty that the system still matches the approved work. If a later owner changed the layout, preserve both sets of records and identify what is uncertain. The permit guide links to local authorities for project-specific questions.
What might the plumber need to verify?
Ask for a short written explanation of the verification work before assuming the entire installation can be reused. Relevant questions include the identity and route of each connection, condition of accessible work, connection elevations, venting, supply routes and compatibility with the fixtures. The plumber selects any locating or testing methods suitable for the property.
If a proposal assumes the existing work is usable, ask what happens if that assumption fails. A good comparison makes the change trigger and the next approval step explicit. This is particularly useful when one contractor includes assessment up front and another leaves it as an allowance.
Your observation checklist
- Photograph the whole space and each visible feature from a safe, accessible position.
- Label each photo by location, without guessing the pipe’s purpose.
- Note whether the floor and walls are finished or exposed.
- List fixtures you want to add, retain or move.
- Record equipment model information only if its label is safely visible.
- Gather prior plans and permit or inspection records.
- Mark missing information “unsure” in the project planner.
Return to the complete basement plumbing guide for the full sequence, or review bathroom rough-in plumbing to define the requested job.