A well-defined basement plumbing project establishes the layout and connection approach before access work, completes required checks before concealment, and schedules finish plumbing when the room and fixtures are ready. Assign each dependency to a named person or company. The sequence below is a coordination aid; the actual schedule and inspection requirements come from the project and its authority.
Agree the layout before rough-in begins
Confirm fixture locations against the intended finished walls and products. Record the drawing date and identify selections that are still provisional. A shower base changed after its drain is placed can affect more than the fixture purchase: the piping, floor work and schedule may also change.
If the existing rough-ins are not verified, put assessment before promises about reuse. If new rough-in work is required, establish how drainage, venting and supply will fit before another trade closes the route.
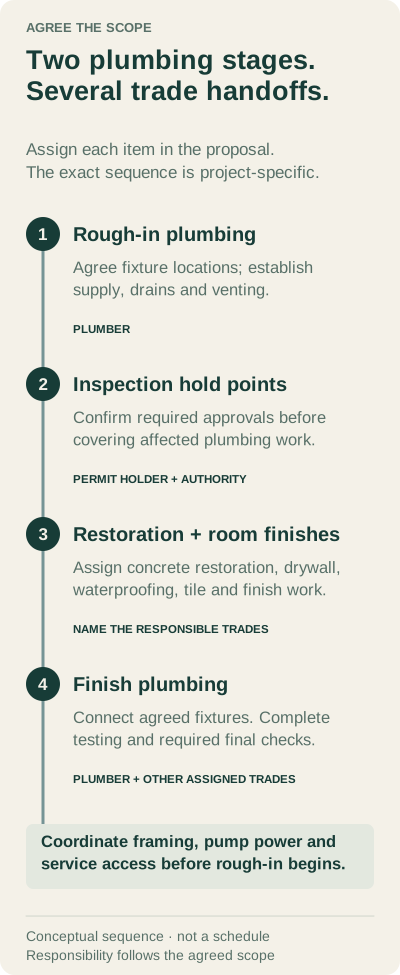
Use a responsibility matrix
| Stage | Responsibility to assign | Completion condition to discuss |
|---|---|---|
| Assessment and layout | Homeowner, plumber and remodeler if involved | Existing conditions and proposed fixtures understood |
| Scope and approvals | Permit holder and relevant trades | Applications, exclusions and inspection points agreed |
| Access and protection | Contractor named in scope | Access route, belongings and occupied areas prepared |
| Concrete and rough-in | Plumbing/concrete parties as contracted | Work ready for the applicable inspection |
| Inspection and testing | Permit holder and inspecting authority | Required approval before the next concealment stage |
| Restoration and room finishes | Concrete, framing and finish trades | Surfaces ready for the agreed plumbing return visit |
| Equipment power | Assigned electrical contractor | Required electrical work and approvals complete |
| Finish plumbing | Plumbing contractor | Specified fixtures connected and applicable checks completed |
| Handover | Contractor and homeowner | Records, operating information and unresolved items reviewed |
Download the construction responsibility worksheet and write the actual owner beside each stage. Avoid assigning every row to “contractor” if several different companies are involved.
What changes when the home stays occupied?
Discuss routes for workers, materials and debris; storage locations; pets and children; and how to keep the work area separated from everyday use. Identify which belongings the homeowner moves before arrival and which protection is included. Ask how concrete dust and cleanup will be handled under the contractor’s actual work plan.
Water or fixture interruptions depend on the connection work. Ask which fixtures or areas may be affected, how advance notice is given and what conditions are needed to restore use. A rough construction sequence cannot promise uninterrupted service or a fixed number of hours.
If the drain route passes through a finished room outside the new bathroom, include that room in access and repair planning. Photographs of agreed starting conditions help clarify what restoration means later.
When can the floor and walls be closed?
Confirm this with the permit holder and authority before work begins. The presence of installed piping is not the same as approval to conceal it. KCK’s published inspection guidance expressly describes under-slab inspection before gravel cover and concrete; do not assume another jurisdiction’s checkpoints are identical.
Overland Park’s residential plumbing amendment places required testing responsibility on the permit holder. Use the local permit guide to identify the appropriate starting point and ask which approval releases the next stage for your scope.
What needs to be ready for finish plumbing?
Agree readiness with the installer: the necessary room surfaces, fixture products, cabinets or counters, equipment power and access must be in the contracted condition. Record what happens when another trade or delivery delays the return visit. A finish visit should not be confused with a promise to supply all remaining bathroom work.
Before adding permanent storage or cabinets, check pump service access and other access points. Restoring a wall should preserve the agreed way to inspect and service the systems behind it.
What belongs in the handover?
Retain inspection and approval records, the final scope and changes, concealed-work photographs if available, equipment and fixture details, manuals and applicable warranty paperwork. Ask the installer to explain normal operation and the response to equipment alarms or power loss where relevant.
Use the completion worksheet for open items and records received. The proposal comparison guide helps put those deliverables into the scope before work starts; the complete guide connects the sequence to the underlying system choices.